In this article #
In this guide, you will see how you can install ShortPixel Adaptive Images (SPAI), an explanation of its settings and how to know if SPAI is working well, and if it isn’t, how to solve it. Let’s go!
1. Installing ShortPixel Adaptive Images (SPAI) #
There are 3 ways you can install SPAI, and they are the same as with every other plugin.
1.1 Using WordPress plugin search #
- Go to your WordPress admin area and click on Plugins > Add New.
- Find the plugin by typing “shortpixel adaptive images” in the search field.
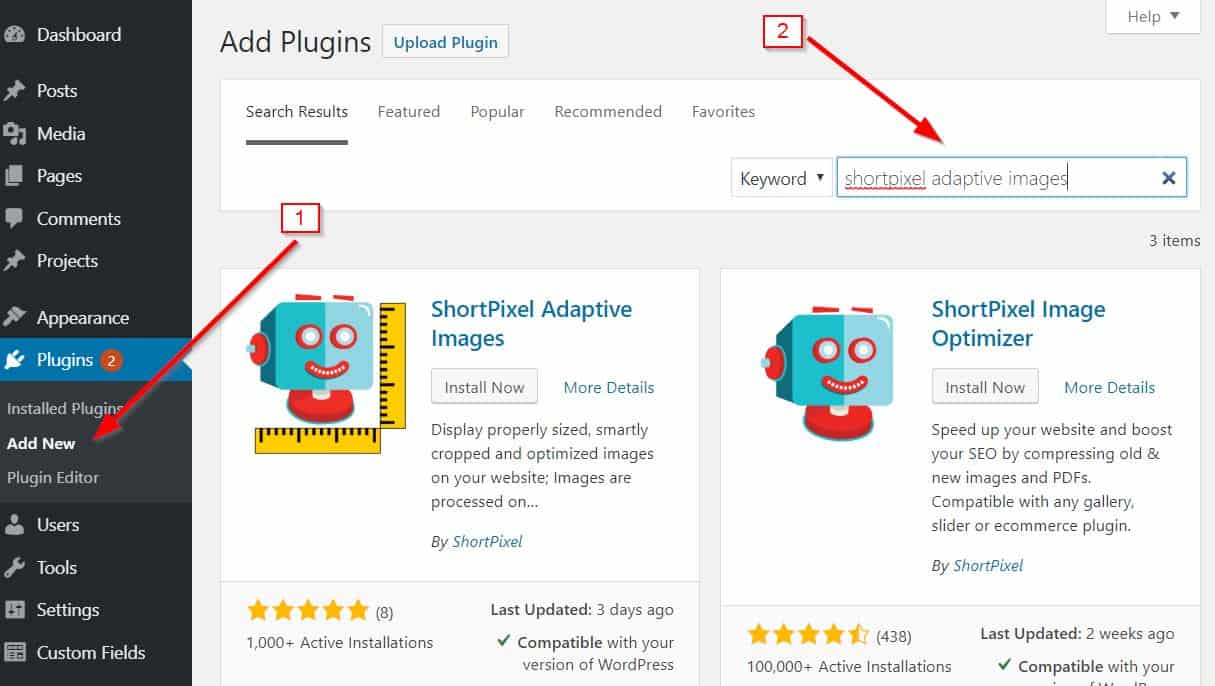
- Click on Install Now on the ShortPixel Adaptive Images box. Once installed, the button will change to Activate. Click on it and that’s it!
1.2 By uploading the plugin #
You can also download and upload the plugin if you don’t feel like using the plugin search.
- Download the plugin by clicking here.
- Go to your WordPress admin area and go to Plugins > Add New > Upload Plugin
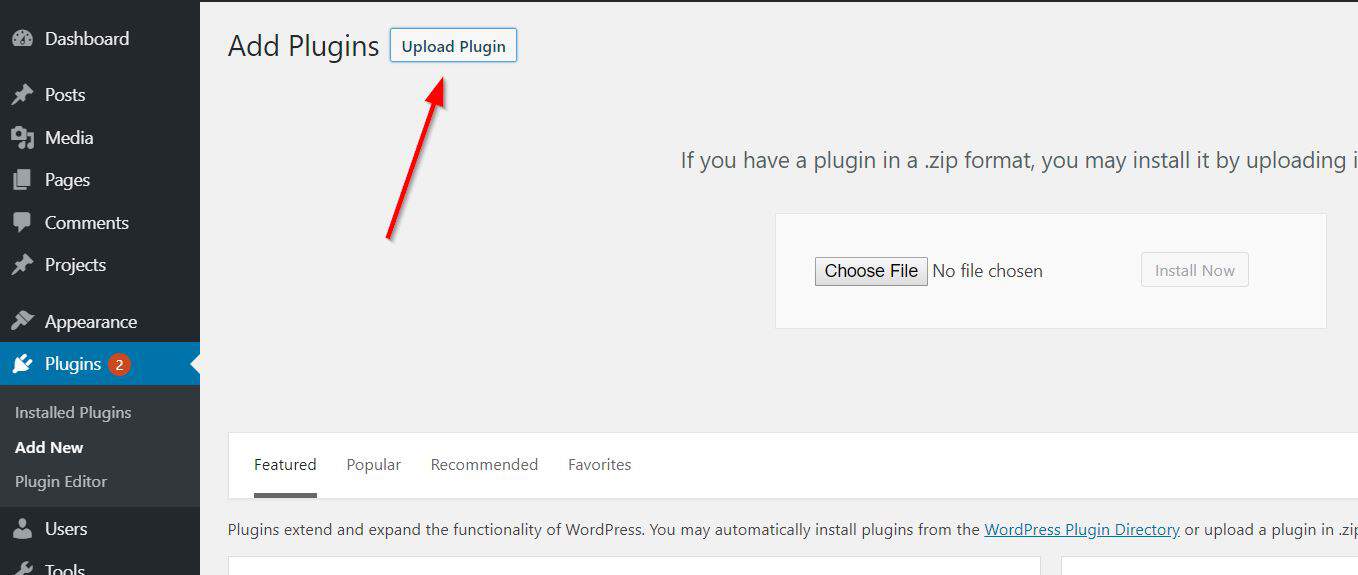
- Click Choose File, look for the .zip file that you downloaded, select it, and upload it by clicking on Install Now. After activating it, that’s it!
1.3 Manually using FTP #
The 3rd way, which is for experienced users, is to download and upload the plugin via FTP.
- Download the plugin by clicking here.
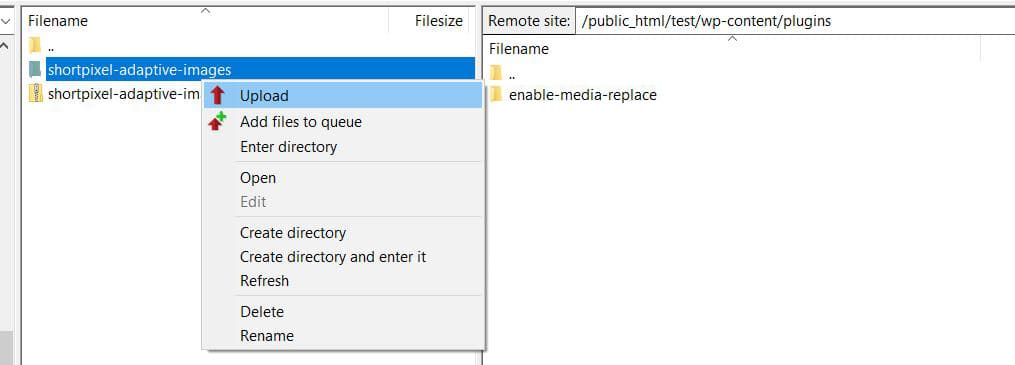
- Extract the .zip file on your computer. Extracting the plugin .zip file will create a new folder with the same name. This is the folder that you need to manually upload to your website using an FTP client.
- Open the FTP client and connect to your website using the login credentials provided by your web host.
- Once connected, you need to access the
/wp-content/pluginspath. - Upload the folder you extracted from the .zip file to the
/wp-content/pluginsfolder on your web server.
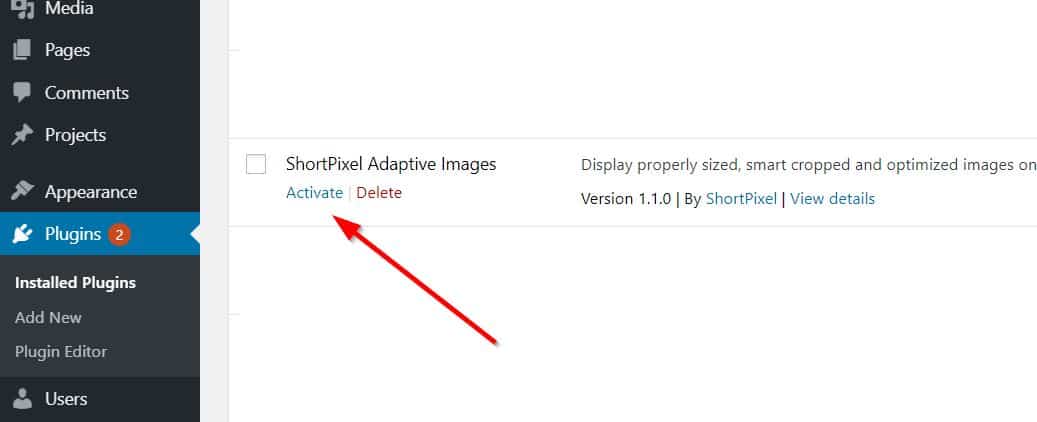
- After uploading the files, go to the WordPress admin area and click on Plugins in the admin menu. You will see your plugin successfully installed on the plugins page.
- Click on the Activate link, as seen below.
2. Onboarding Wizard #
If it’s the first time you are using ShortPixel Adaptive Images, you will now be redirected to the Onboarding Wizard:
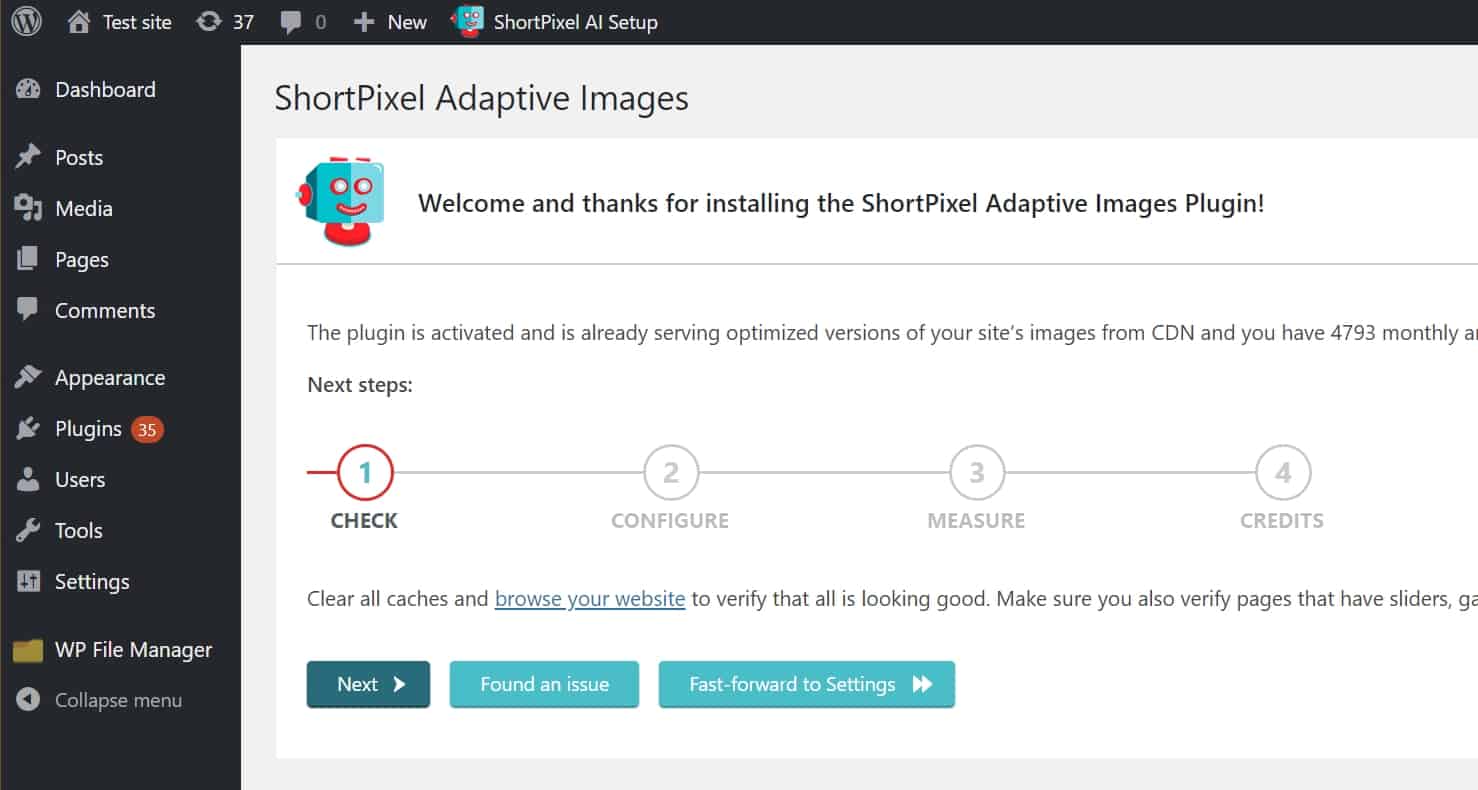 This 4-step wizard will help you configure SPAI properly so all your images are served from our CDN optimized.
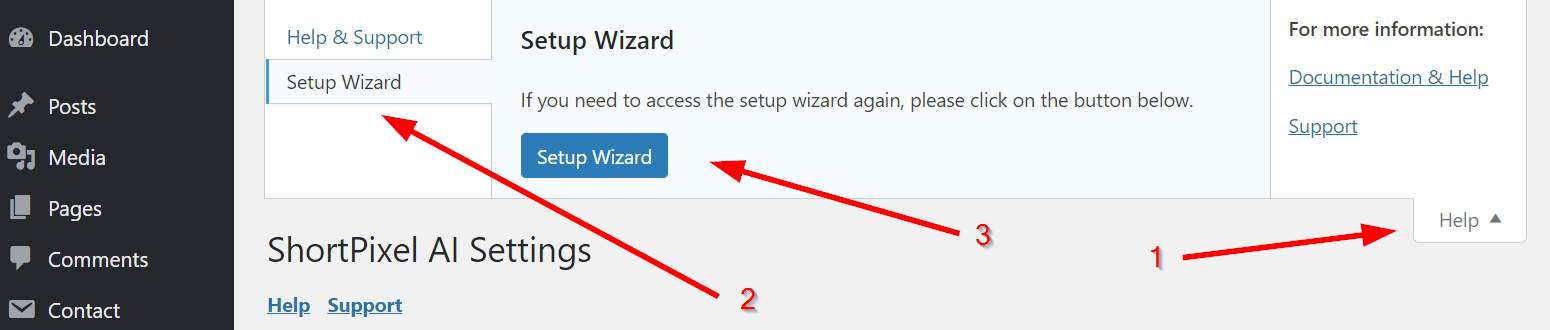
If, for example, you were already using SPAI and updated to the new version, you can restart the wizard by going to Settings > ShortPixel AI and clicking on the “Setup Wizard” button located on the top right Help menu:
Please note that ShortPixel Adaptive Images does not require an API Key to start working. You only need to associate your website/domain to your account so that your ShortPixel credits will be used, and that will be automatically done by the Onboarding Wizard.
After you complete the Onboarding Wizard, be sure to clear the cache of your site: How to clear WordPress cache
3. Settings #
ShortPixel is very easy to use, and it starts doing its magic right after activating and setting it up with the Onboarding Wizard. SPAI also provides you with some settings to tune your image optimization. To adjust the settings, just log in to your WordPress admin area and go to Settings > ShortPixel AI.
Remember to clear the cache of your site after changing your settings: How to clear WordPress cache
If you have just installed the plugin, you will see the settings in simple mode. This mode is ideal for those who just want to install-and-forget. Just enable or disable the settings you want and that’s it.
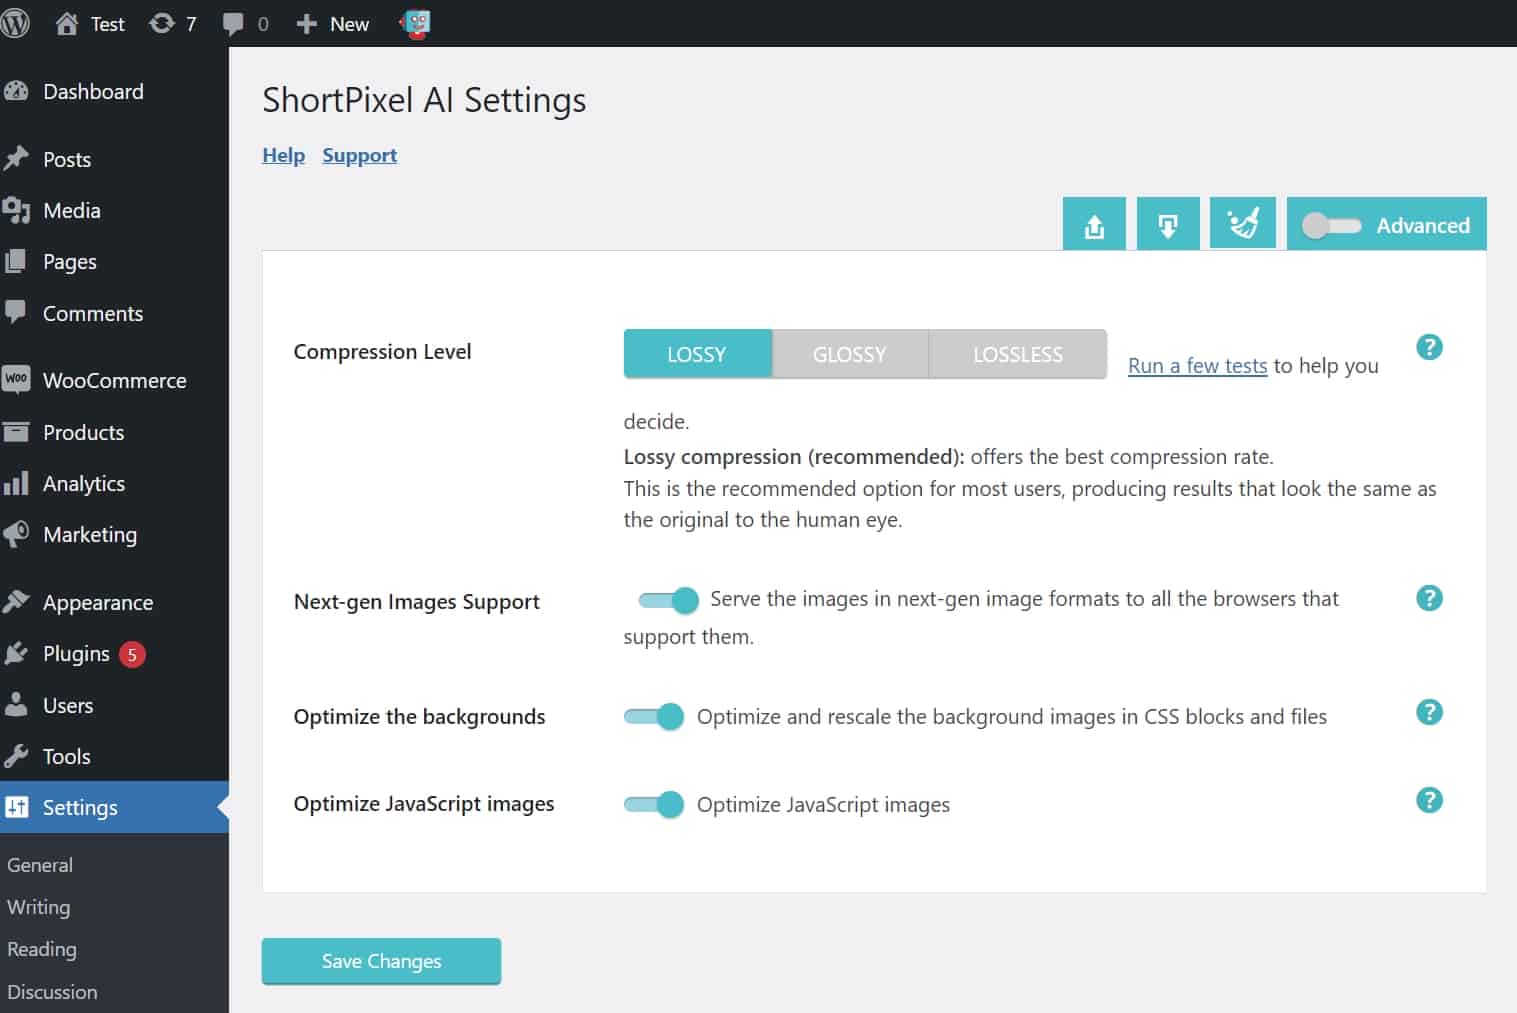
However, if you want, you can activate the advanced mode, where you can customise every single setting according to your preferences.

The settings are organized in 4 tabs:
Click on each link to learn more!
4. Image Checker #
After all the settings are in place and the cache is cleared, be sure to check out the Image Checker tool: How to use the Image Checker tool.

5. Troubleshooting #
Stop right here! Clear your cache before proceeding: How to clear WordPress cache
Now, the first question that comes to mind is: “Is SPAI working well on my website?” You can find out while reading this article!
We also updated our knowledge base with many articles that will help you out when something is not working as expected:
- First of all, for the most common reasons of malfunctioning, check out this article.
- If you notice that no images are properly sized, this article helps you debug everything yourself, step-by-step.
- If, in general, SPAI works correctly, but you still have some images that are not being served by our CDN, try activating one of the following options, located on Settings > ShortPixel AI > Areas:
- Are you using GTmetrix or PageSpeed Insights? Do you get one or more image-related warning messages?
- Do your images appear as “data:image/svg” if you inspect the code? Then read this.
- SPAI is not serving the WebP images correctly? Maybe it does!
- Do you get a 500 error when installing the plugin? Make sure to read this.