To use Fastly as your CDN when using ShortPixel Adaptive Images, instead of ShortPixel’s CDN, follow these steps:
- Create an account with Fastly if you have not already done so: https://www.fastly.com/
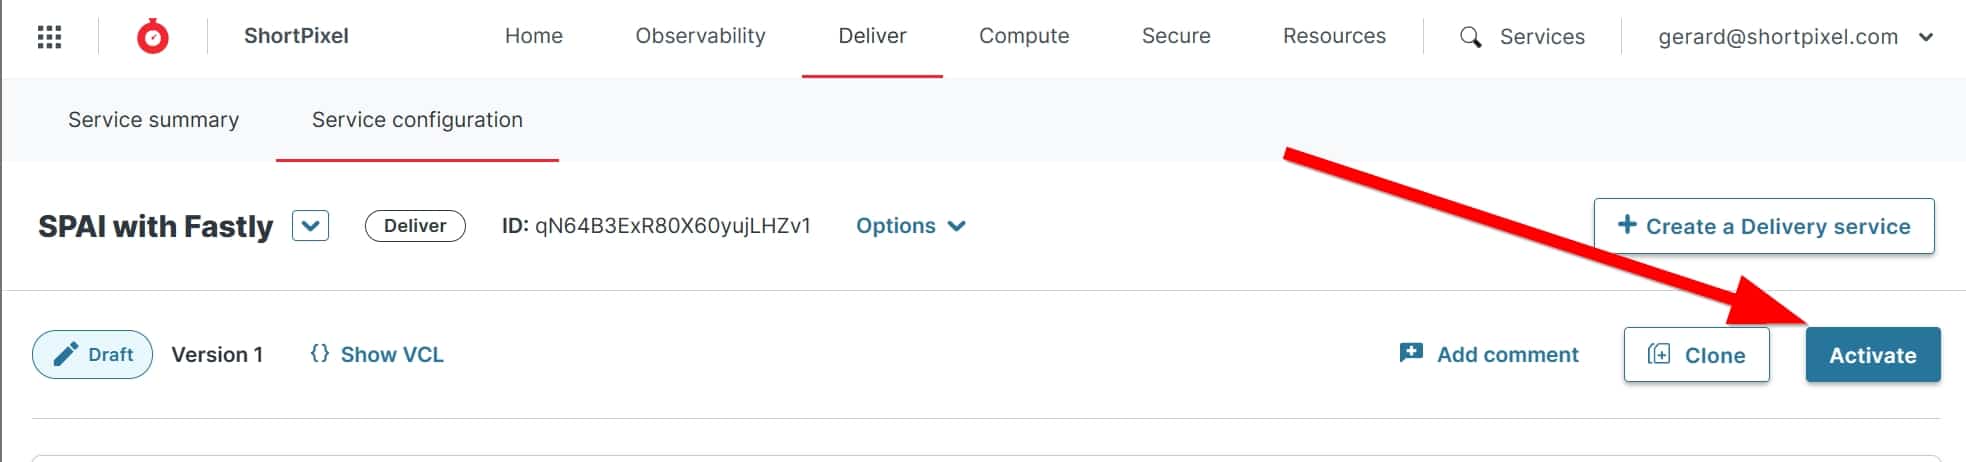
Go to Deliver > Create a Delivery service.
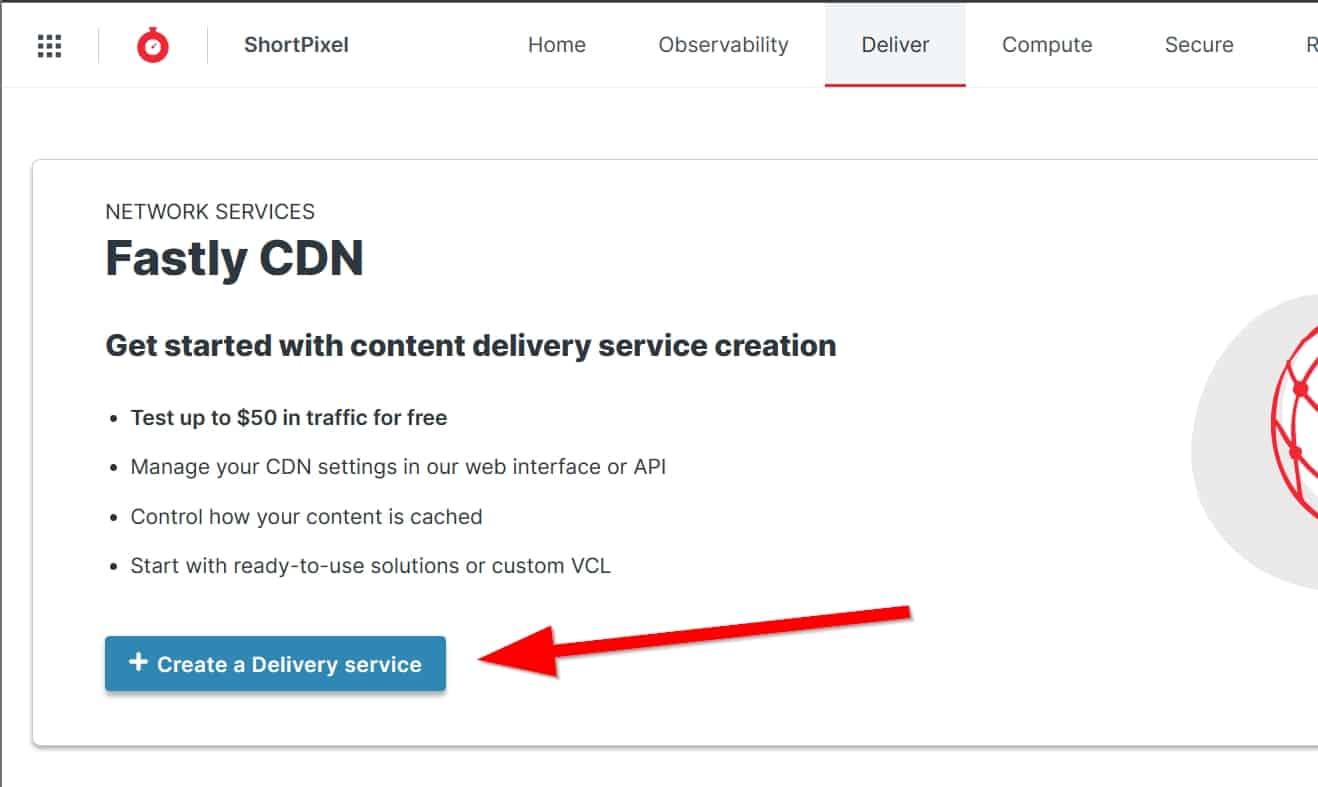
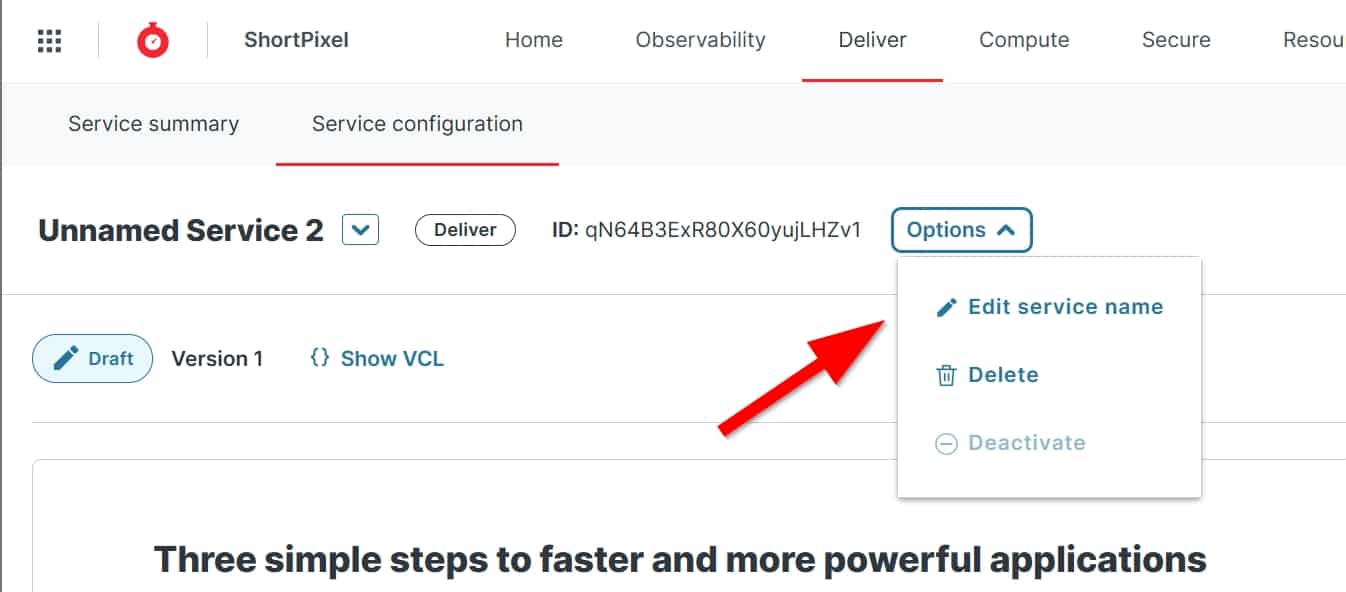
Name the service for better organization. Go to Options > Edit service name in the top bar and give it a better name. For example, “SPAI with Fastly”.
- Think about a name for the subdomain you want the images to be delivered from. For example, if your domain is mywebsite.com, you could choose
img.mywebsite.com. Ifimgis already used by another CNAME, think of something else, likeimages.mywebsite.com ormedia.mywebsite.com. Assuming you have chosen
img, now enter “img.mywebsite.com” as the domain.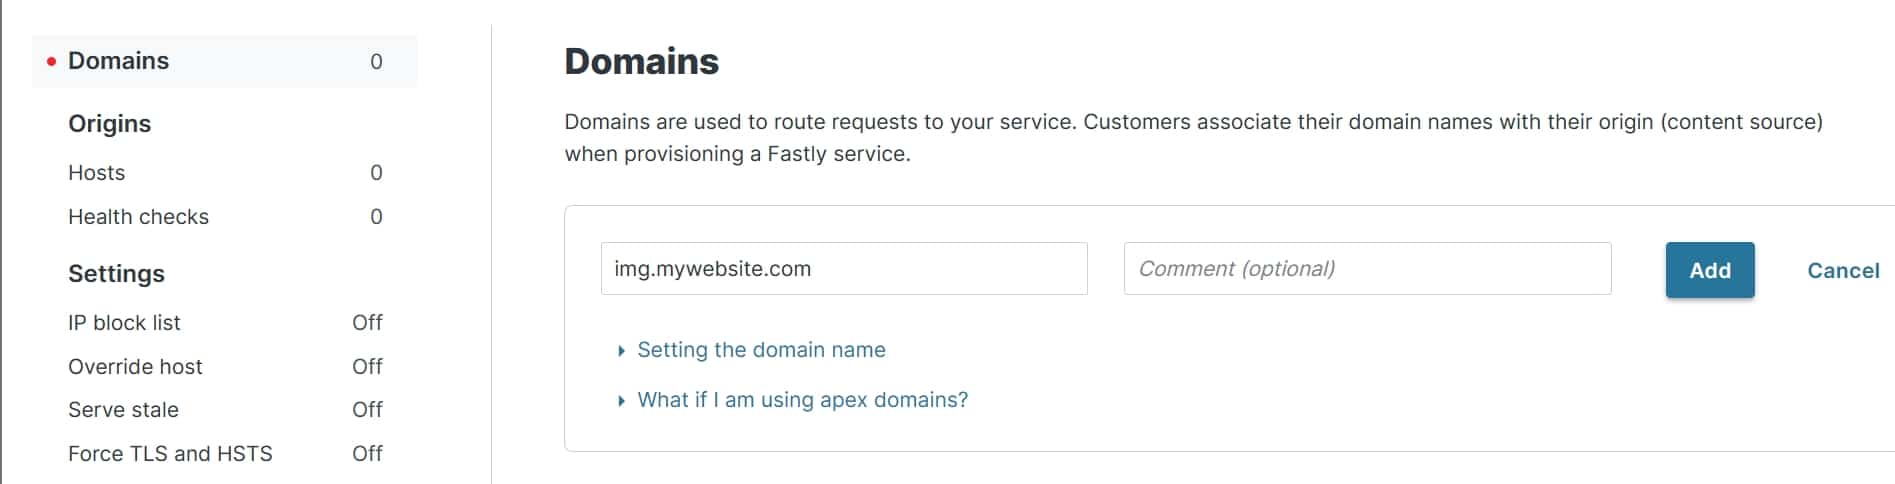
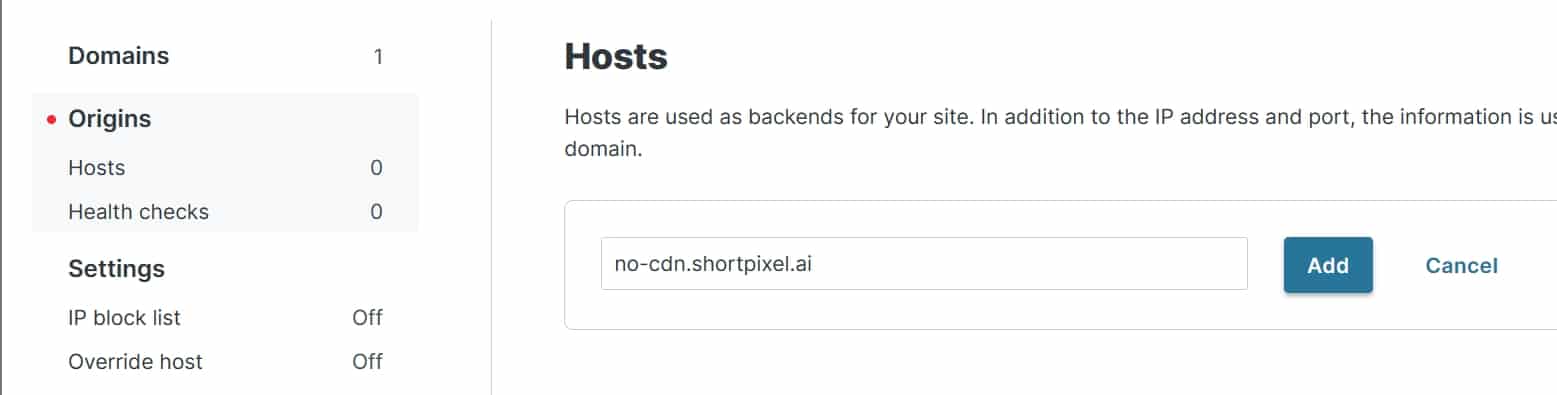
Go to Origins, on the left, and enter “no-cdn.shortpixel.ai” as your host.
Activate the Service.
In your DNS editor, from your domain (ask your domain provider if you don’t know where it is), add a new CNAME record from
img.mywebsite.comto “n.sni.global.fastly.net”.
Remember that
mywebsite.comshould be changed to your actual domain.- Wait 5 minutes for your domain provider to complete all technical tasks in the background.
- Check with this tool if your CNAME is propagated correctly. If not, wait 24h-48h.
- Take any image URL from your website, append it to
http://img.mywebsite.com/spai/q_lossy+ret_wait/(note that it does not have HTTPS, we will take care of that later) and make sure that the new URL can be accessed. Example:- If your website is called mywebsite.com, your new CNAME is
img.mywebsite.com, and your sample image ishttps://www.mywebsite.com/wp-content/uploads/2022/04/image.jpg, - Try to access this URL:
http://img.mywebsite.com/spai/q_lossy+ret_wait/https://mywebsite.com/wp-content/uploads/2022/04/image.jpg - Can you view it without errors? Proceed to the next step.
- If your website is called mywebsite.com, your new CNAME is
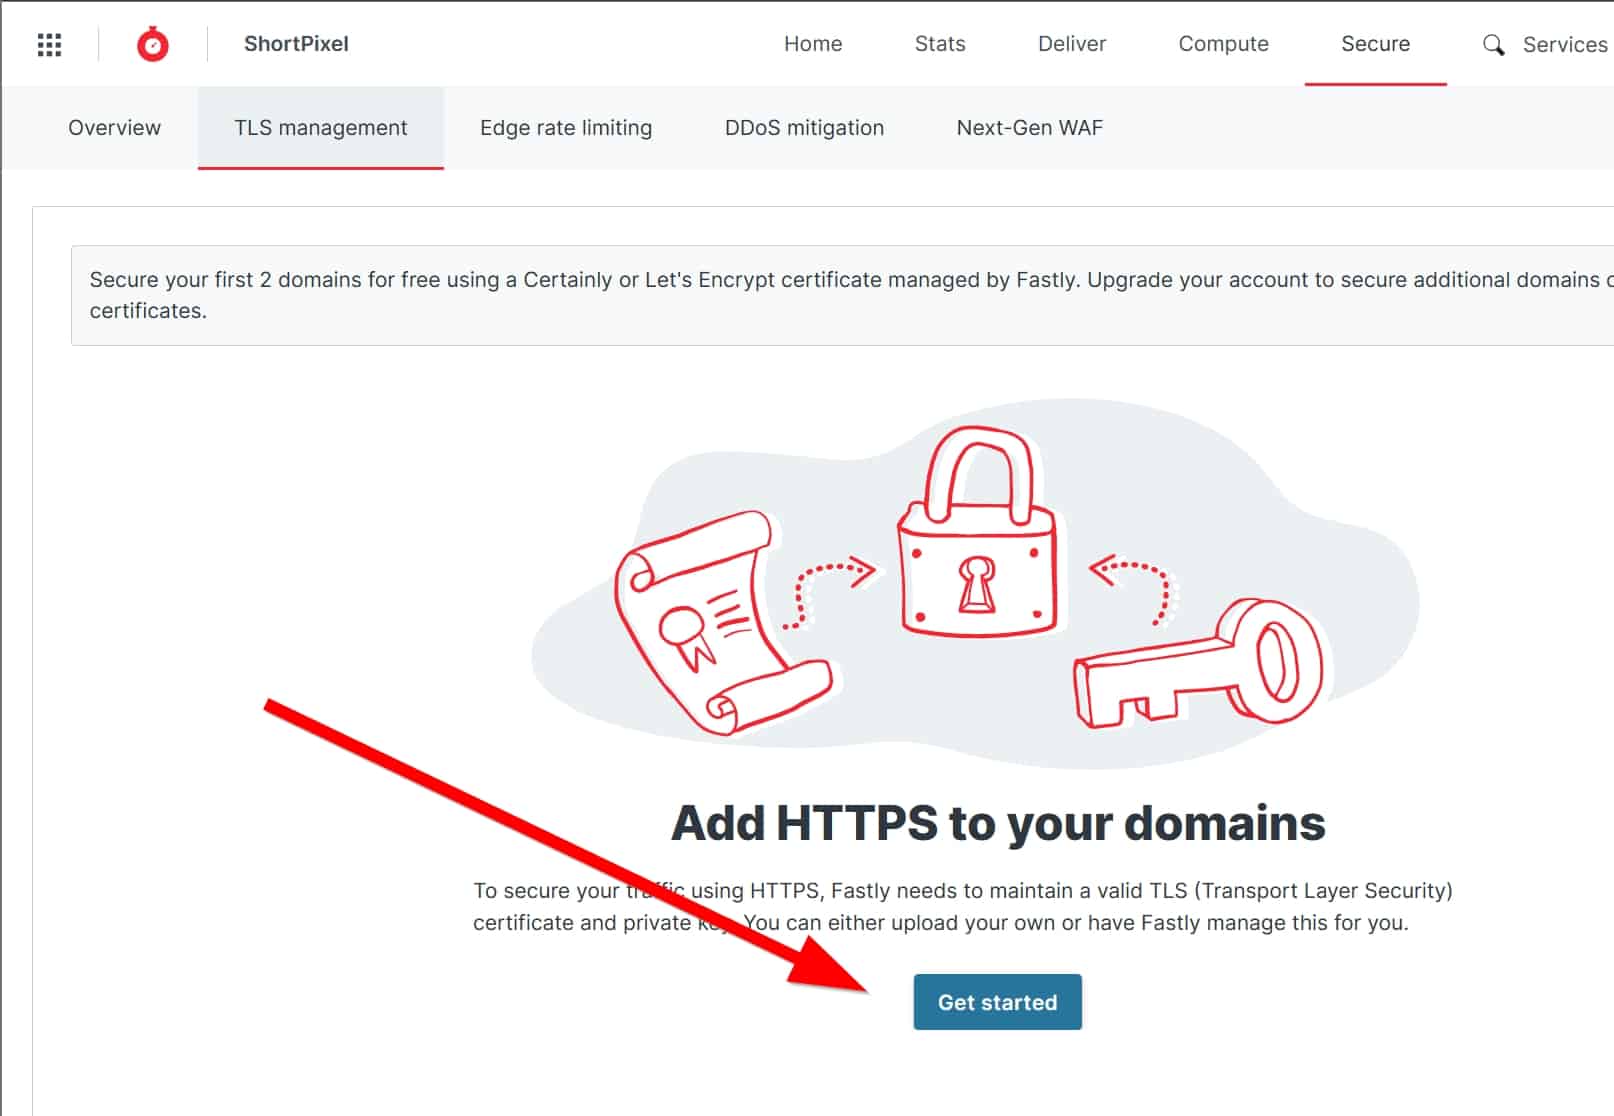
Return to Fastly and go to Secure > TLS Management and click on Get started.
Add your custom subdomain (in our case “img.mywebsite.com”) and click on Add.
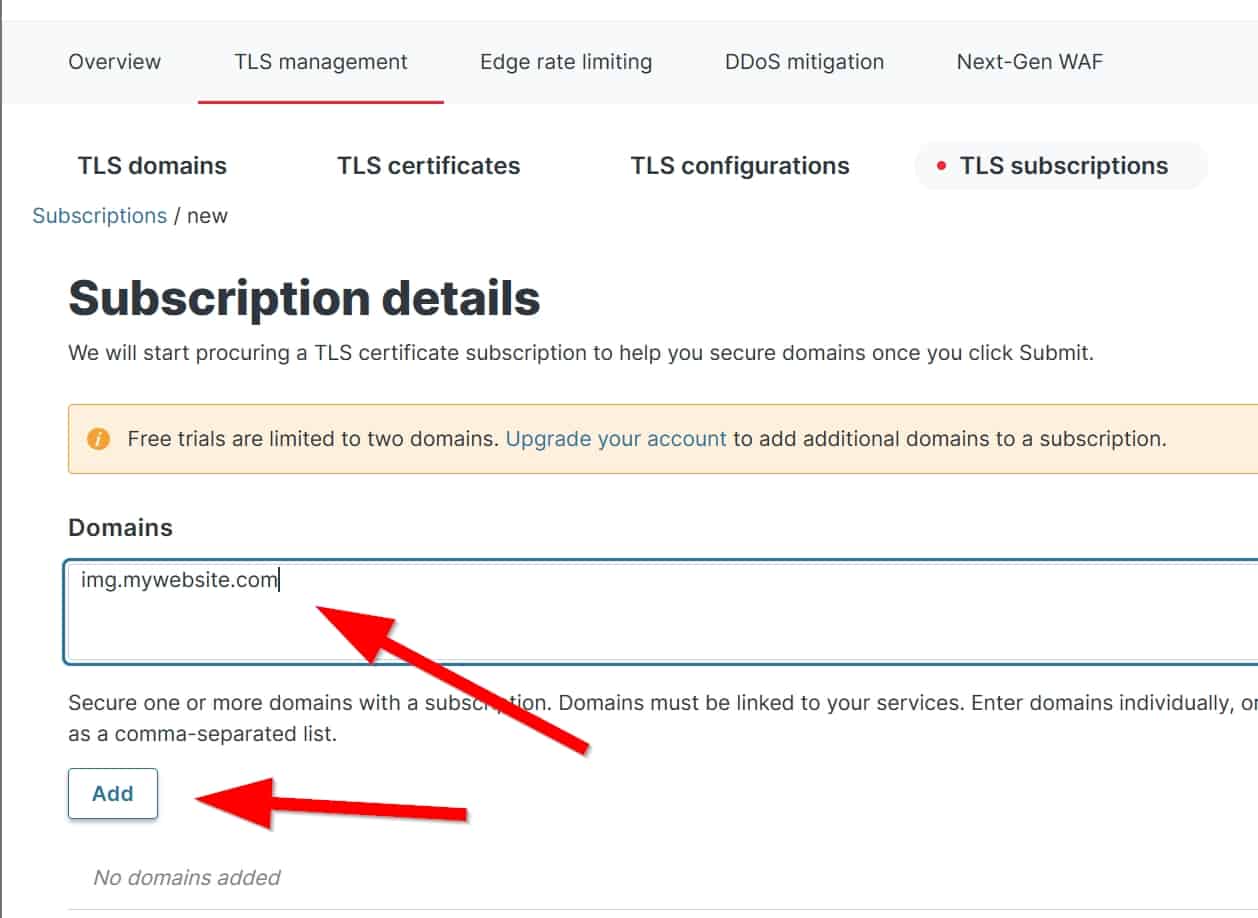
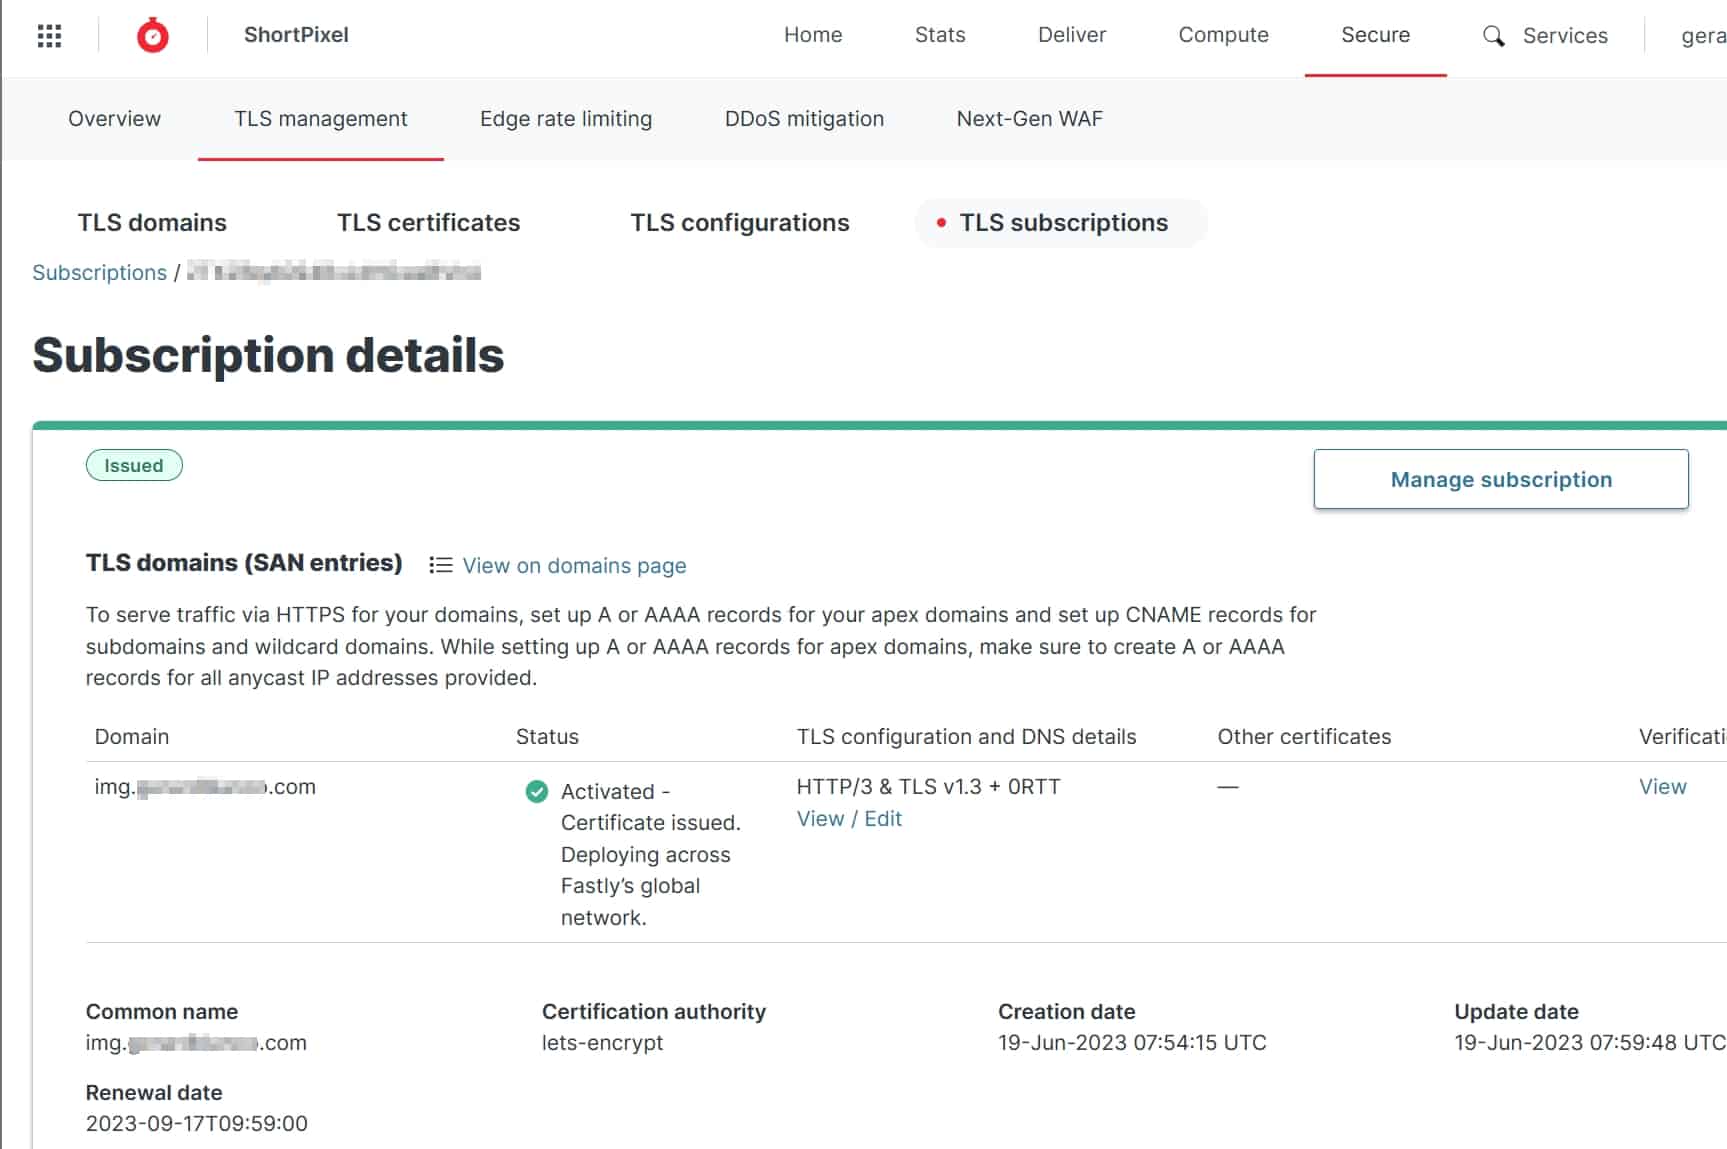
Now click Submit at the bottom of the page and wait for the process to complete.
- You have done everything on Fastly. Now go to your WordPress website and change the API URL of ShortPixel AI.
- Go to Settings > ShortPixel AI > Behaviour and enter
https://img.mywebsite.com/spaiin the API URL field. - Replace
mywebsite.comwith your actual domain name. Replace the
imgpart if your subdomain is different, like configured above.
- Go to Settings > ShortPixel AI > Behaviour and enter
- Clear your WordPress cache: How to clear WordPress cache