Important: If you are on a free plan or have purchased one-time credit packages, you will not be able to add a custom subdomain unless you use your own CDN to deliver the images instead of ShortPixel’s. Custom subdomains with ShortPixel’s CDN are exclusively available to users who have subscribed to an unlimited or monthly/yearly plan.
If all you want to do is use your own CDN to deliver the images, and you don’t care about the “Accept requests only from specific domains” feature, you can just follow this simpler tutorial.
By default:
- ShortPixel Image Optimizer (SPIO) serves images from
spcdn.shortpixel.ai - ShortPixel Adaptive Images (SPAI) serves images from
cdn.shortpixel.ai
If you’d prefer to serve images from your own subdomain (like img.example.com), here’s how to set it up:
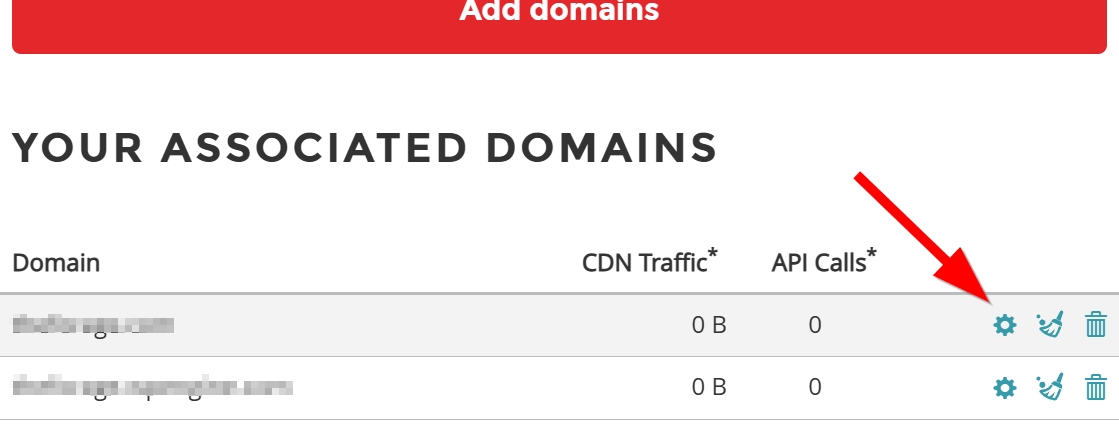
- Log in to your ShortPixel account and from the dashboard, click Associate Domains.
- Add your domain if it wasn’t there yet: How can I associate a domain to my account?
- Click the gear icon next to your domain to open its settings
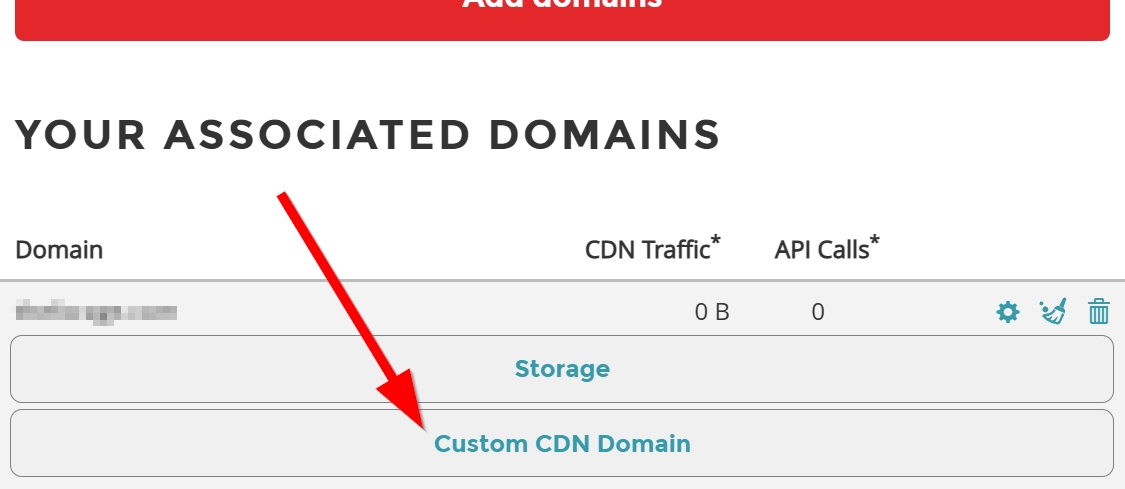
- Click on the Custom CDN Domain button.
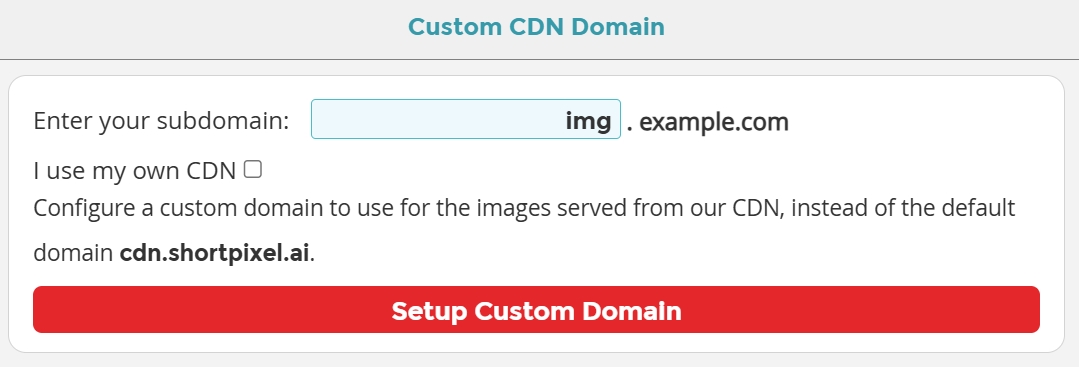
- Think of a suitable subdomain name for the delivery of your images, such as
cdn,img,images,media, and so on. For example, if your website isexample.comand you chooseimgsubdomain, your images will be served fromimg.example.com. - Enter your preferred subdomain name in the “Enter your subdomain” text box.
- If you want to use your own CDN and do not want to use ShortPixel’s CDN, check the box “I use my own CDN”.
- Click on the red Setup Custom Domain button.
- Navigate to your domain’s DNS records, and add the CNAME you chose (e.g.
img.example.com). If you’re unsure how, please contact your hosting provider for assistance.- If you want to keep using ShortPixel’s CDN, the CNAME must point to
cdn.shortpixel.ai(If you are using Cloudflare for your DNS, the record must be DNS Only instead of Proxied) - If you want to use your own CDN, the CNAME must point to
no-cdn.shortpixel.ai
- If you want to keep using ShortPixel’s CDN, the CNAME must point to
- Once the CNAME record has finished propagating (which may take up to 48 hours), you can return to your ShortPixel dashboard where you should find the subdomain added to your list of associated domains.
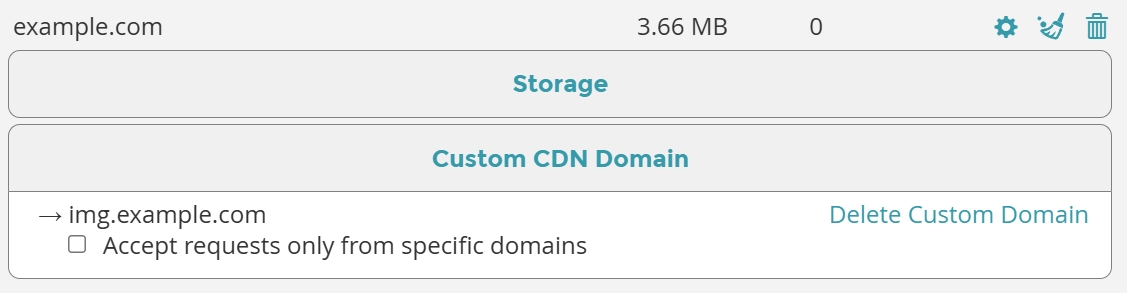
- Optionally, for increased security, you may check the box “Accept requests only from specific domains” and enter a comma-separated list of domains. For example, if only example.com and wonderfulshop.com should serve images from
img.example.com, set it up as shown in the following screenshot: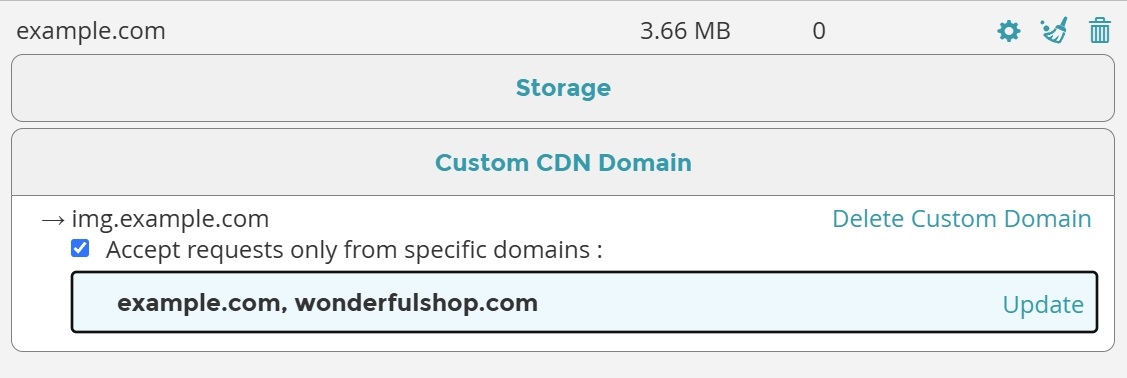
- Change the CDN domain / API URL on the WordPress settings.
- If you are using SPAI, navigate to your WordPress dashboard and go to Settings > ShortPixel AI > Behavior > API URL. There, change the default URL to
https://img.example.com/spaiwhereimg.example.comis the subdomain that you’ve set up above.
- If you are using SPIO, navigate to your WordPress dashboard and go to Settings > ShortPixel > WebP/AVIF & CDN and enable the “Deliver the next generation images using the ShortPixel CDN” option. There, change the default URL to
https://img.example.com/spiowhereimg.example.comis the subdomain that you’ve set up above.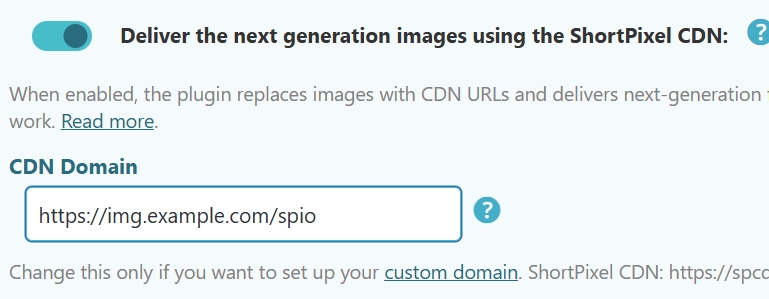
- If you are using SPAI, navigate to your WordPress dashboard and go to Settings > ShortPixel AI > Behavior > API URL. There, change the default URL to
Please make sure you flush your website’s cache (whichever is applicable – caching plugin, server cache, CDN cache, and browser cache).