ShortPixel’s hosting service does not offer email services, but it can manage your DNS so that all email requests are routed through your preferred email provider.
Edit your nameservers #
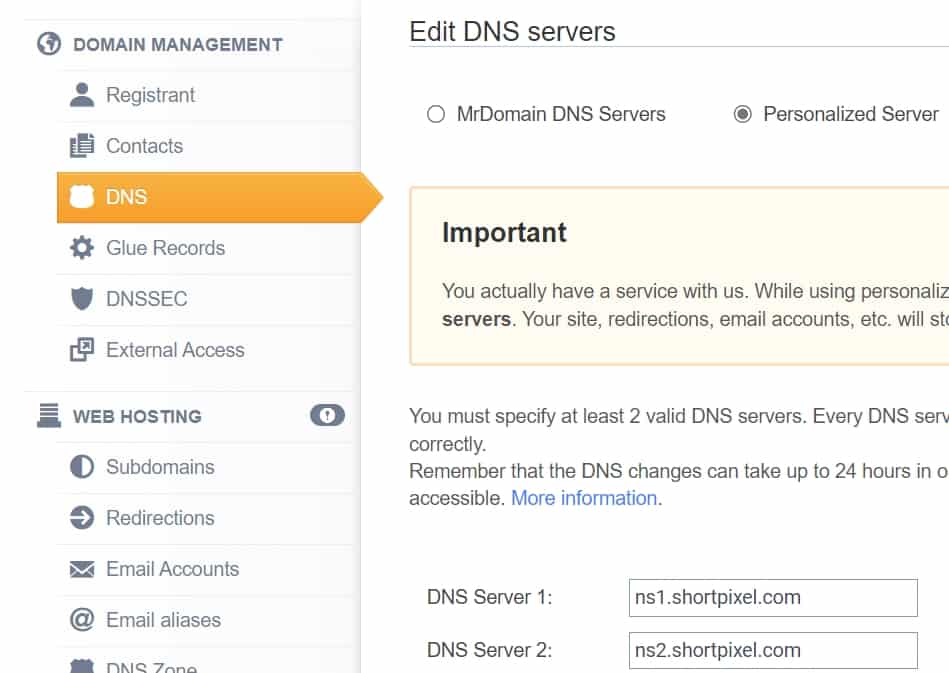
You will need to go to your domain registrar and edit your nameservers to point to those of ShortPixel, namely:
- ns1.shortpixel.com
- ns2.shortpixel.com
Here is an example with MrDomain. If you do not know how to do this with your domain registrar, please contact them.
Now make sure that all the DNS records you had with your domain registrar are also present in your ShortPixel account. For this purpose:
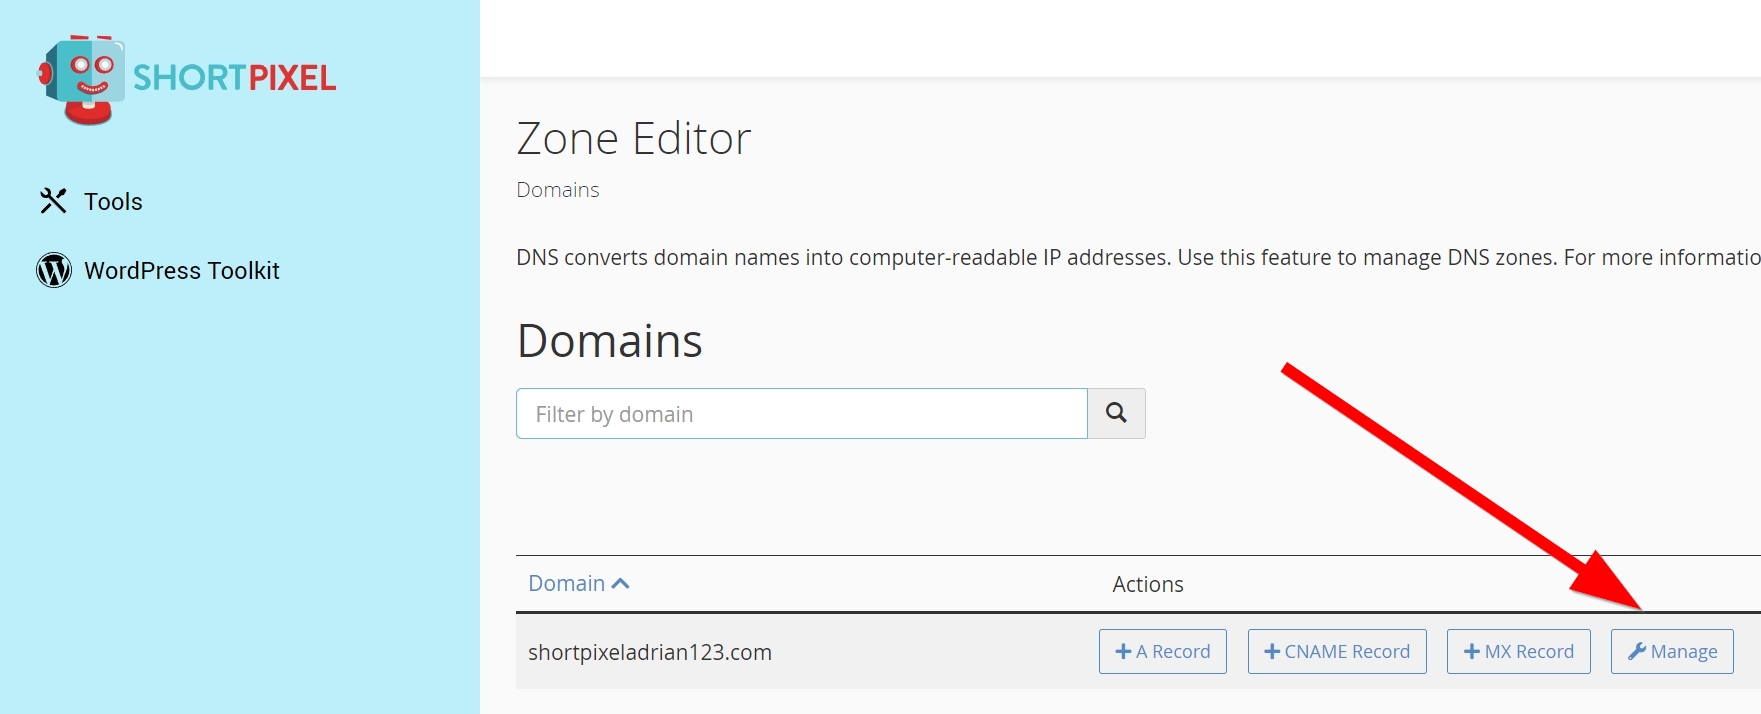
- Go to your ShortPixel cPanel > Tools > Domains > Zone Editor
Click on Manage next to your domain and you will see all your DNS records. If they are not there, add them manually.
Keep this window open, because you will come back to it.
Create your email accounts #
The next step is to create your email accounts. We will use Zoho Mail as an example because it’s a very affordable option.
Now, we invite you to follow these instructions on the official Zoho Mail website.
- In the Verify Domain Ownership step, do not forget to add the required DNS records in your ShortPixel cPanel in the Zone Editor section, not with your domain registrar! (see below).
- When you get to the DNS Mapping section, you need to add all these DNS records in your ShortPixel cPanel in the Zone Editor section, not with your domain registrar! (see below).
Add DNS records #
During the creation of your email accounts, you need to add some DNS records in the ShortPixel cPanel. To do this, follow the steps below:
- Go to your ShortPixel cPanel > Tools > Domains > Zone Editor
- Click on Manage next to your domain and you will see all your DNS records
- Delete the existing MX record and mail.domain CNAME before adding your own records. Example:

- Click on Add Record and choose the type of record. You will need either CNAME, MX or TXT.
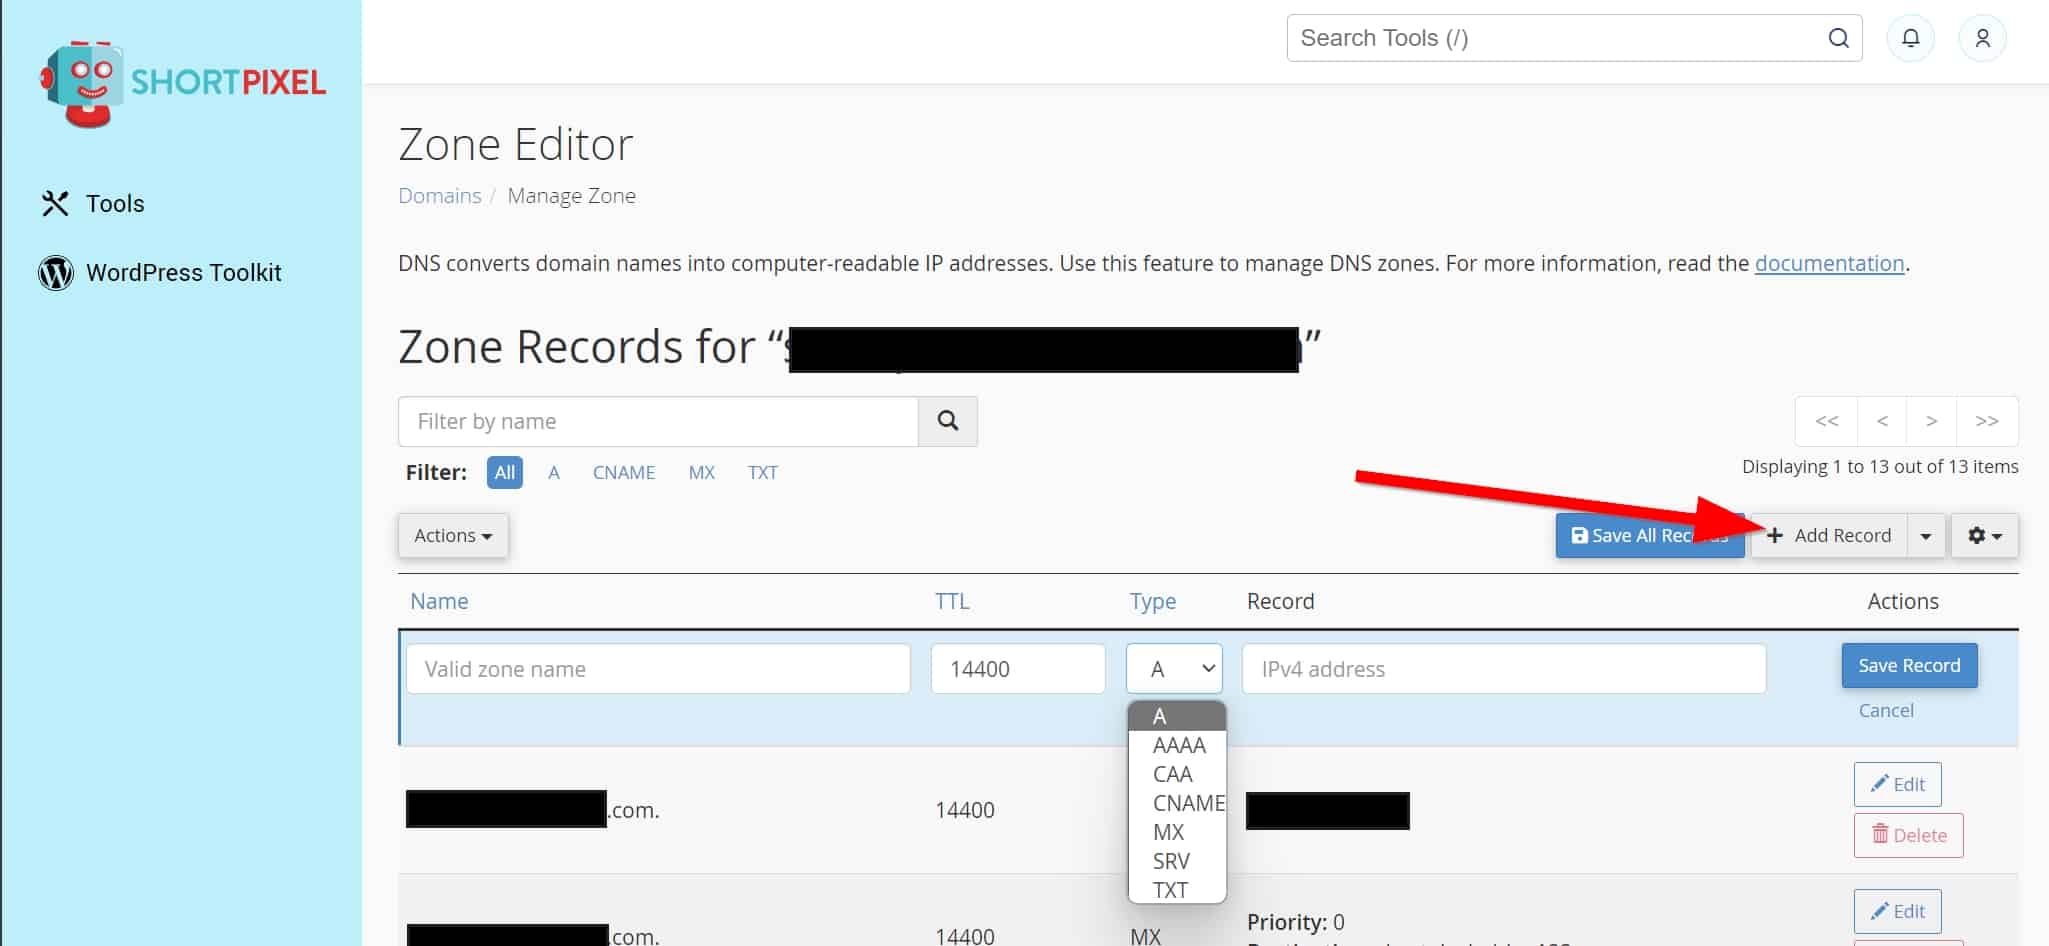
Fill in the fields according to your email hosting provider’s instructions.