Transactional emails are messages that are automatically sent after a user performs an action on your website or application. Examples of transactional emails are:
- Password reset emails
- Welcome emails
- Shipping confirmations
- Payment invoices
- Order confirmation emails
If you want to use ShortPixel’s hosting service and send transactional emails, you will first need to sign up for a new account with a third-party transactional email provider such as
Mailgun, Sendinblue, SendGrid or SparkPost.
In this tutorial, we will use Sendinblue as an example for the instructions.
Sign up #
This step, of course, depends on the service provider you choose. Since we are using Sendinblue, here are the official instructions from their YouTube channel.
Retrieve SMTP settings #
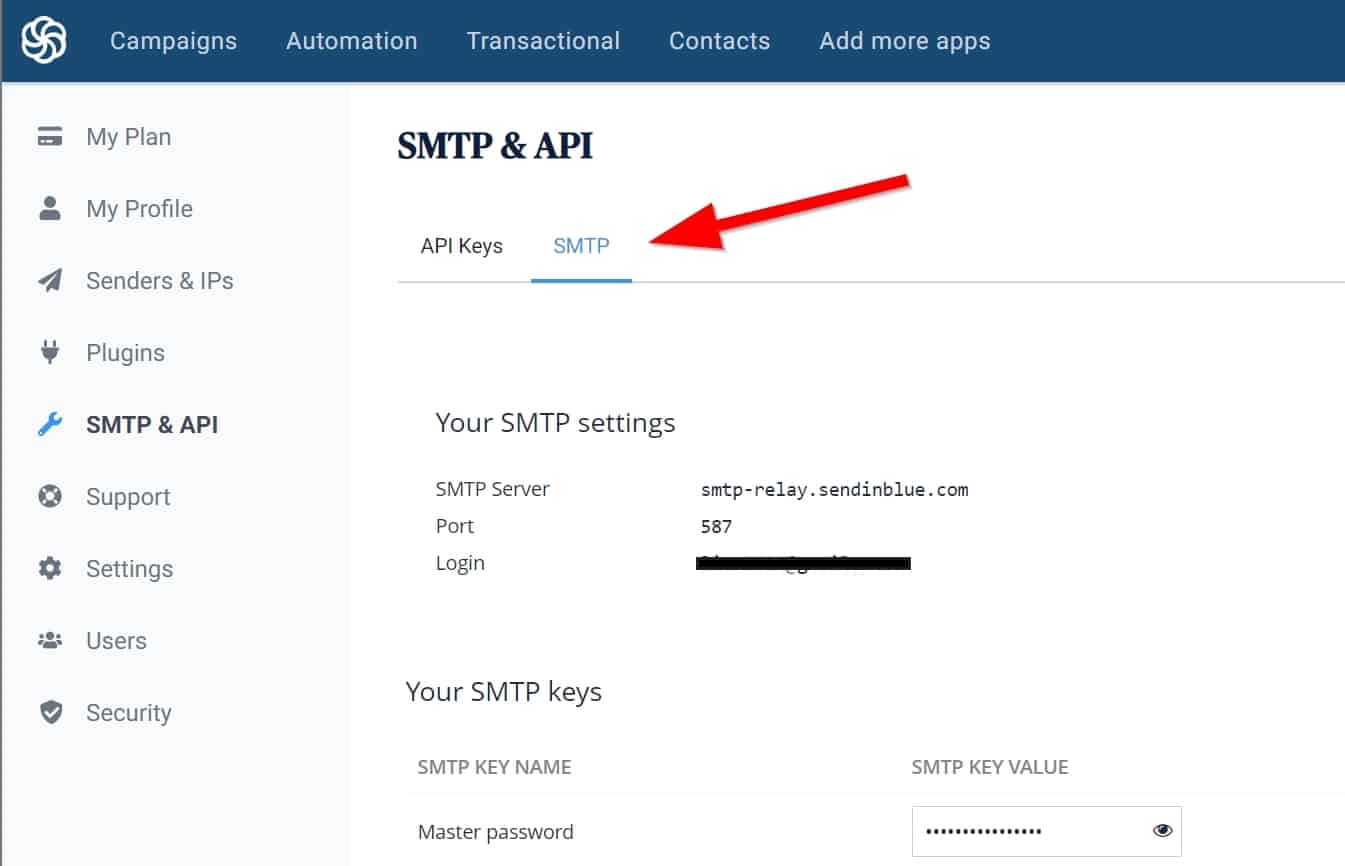
Once the account is created, log in and proceed as follows:
- Click on your name in the top right menu.
- Choose SMTP & API.
- Click on SMTP, copy all the information (SMTP Server, Port, Login, Master password) and paste it in a safe place.
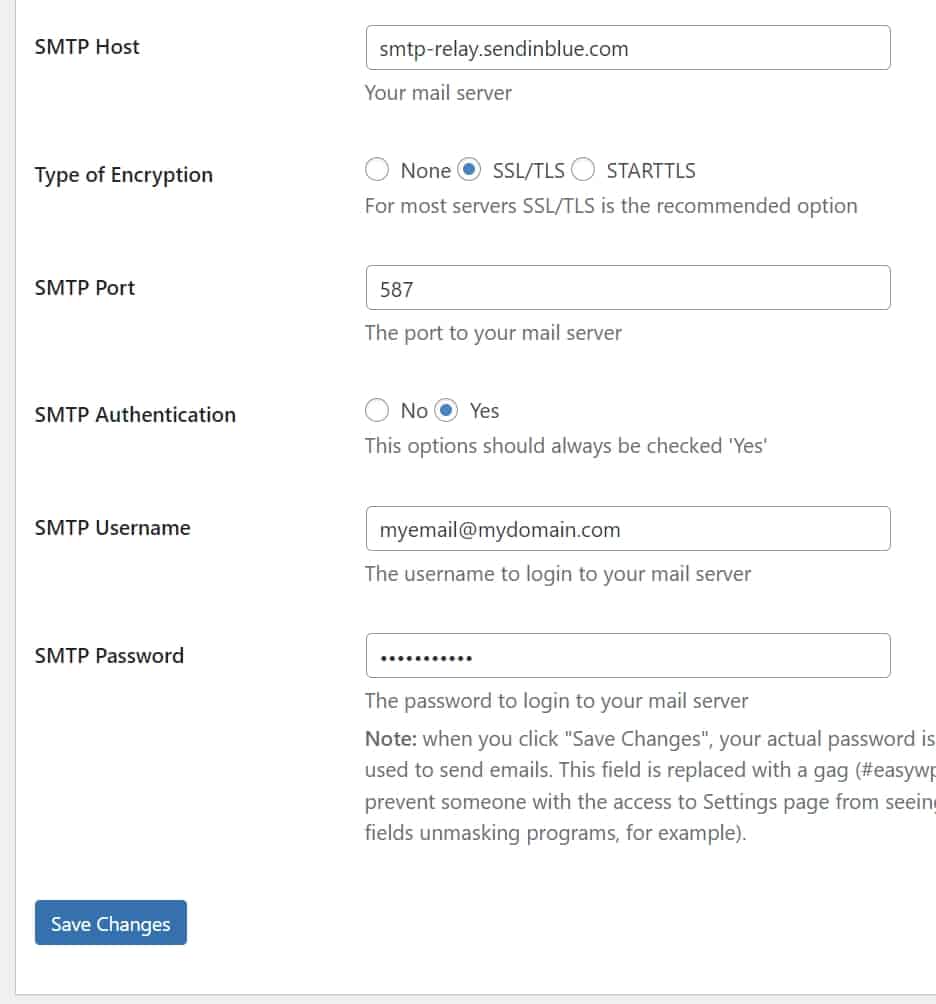
WordPress configuration #
Now go to your WordPress dashboard and proceed as follows.
- Install the Easy WP SMTP plugin.
- Go to Settings > Easy WP SMTP > SMTP Settings.
- Copy the SMTP Server field from Sendinblue and paste it into the SMTP Host field.
- Select SSL/TLS in the Type of Encryption field.
- Copy the Port field from Sendinblue and paste it into the SMTP Port field.
- Copy the Login field from Sendinblue and paste it into the SMTP Username field.
- Copy the Master password field from Sendinblue and paste it into the SMTP Password field.
- Customize the rest of the fields according to your needs