If you want to use your own account of bunny.net as your CDN when using
ShortPixel Adaptive Images, instead of ShortPixel’s CDN, follow these steps:
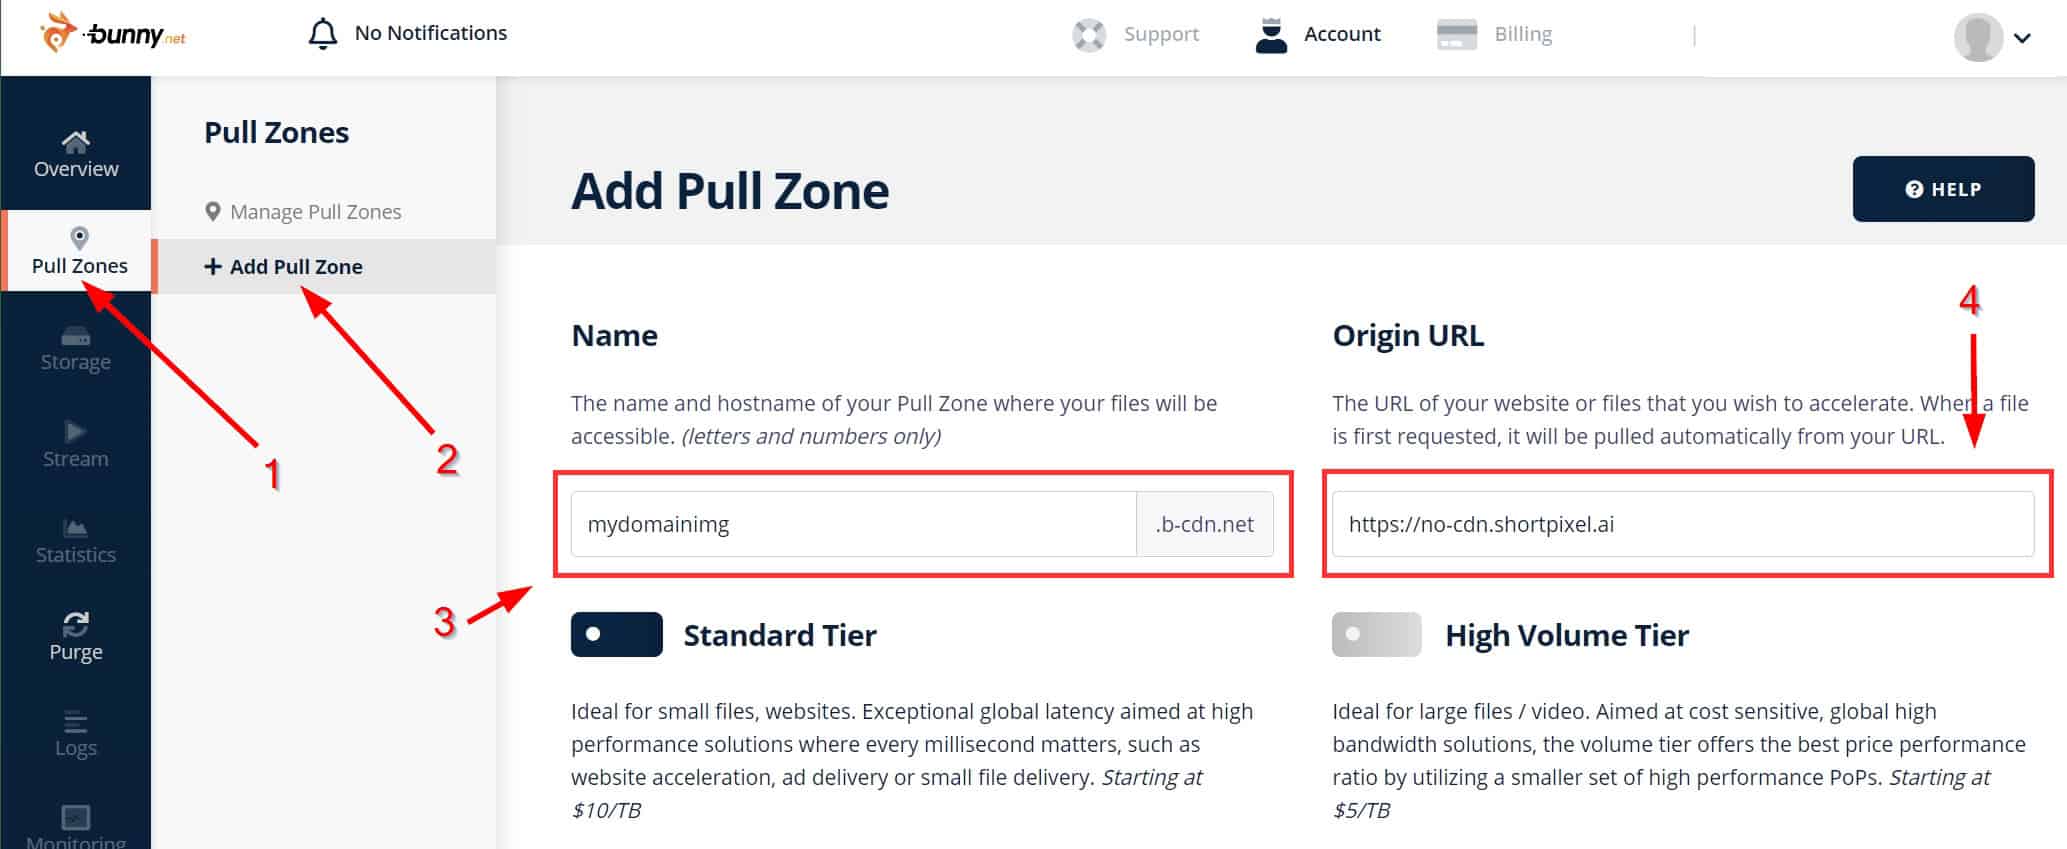
- Enter your bunny.net account
- Go to “Pull Zones” and click on “Add Pull Zone“.
-
Under ”
Name“, add whatever you want. For example,mydomainimg. That is going to be the custom domain on the URL of your images. Here’s an example of what they will look like:https://mydomainimg.b-cdn.net/spai/w_675+q_glossy+ret_img+to_webp/https://mydomain.com/wp-content/uploads/2019/06/IMG_1188.jpg
- Under “Origin URL“, add
https://no-cdn.shortpixel.ai - Go to your WordPress dashboard and then Settings > ShortPixel AI > Behaviour. Enter
https://mydomainimg.b-cdn.net/spaiin the API URL field.- Replace
mydomainimgwith what you actually wrote in step #3

- Replace
- Login to your ShortPixel dashboard and associate
mydomainimg.b-cdn.netto your account. Remember to replacemydomainimgwith what you actually wrote in step #3. For more information on how to associate a new domain, please check this article.