1. Install ShortPixel Image Optimizer (SPIO) #
There are 3 ways you can install ShortPixel Image Optimizer (SPIO), and they are the same as with every other plugin.
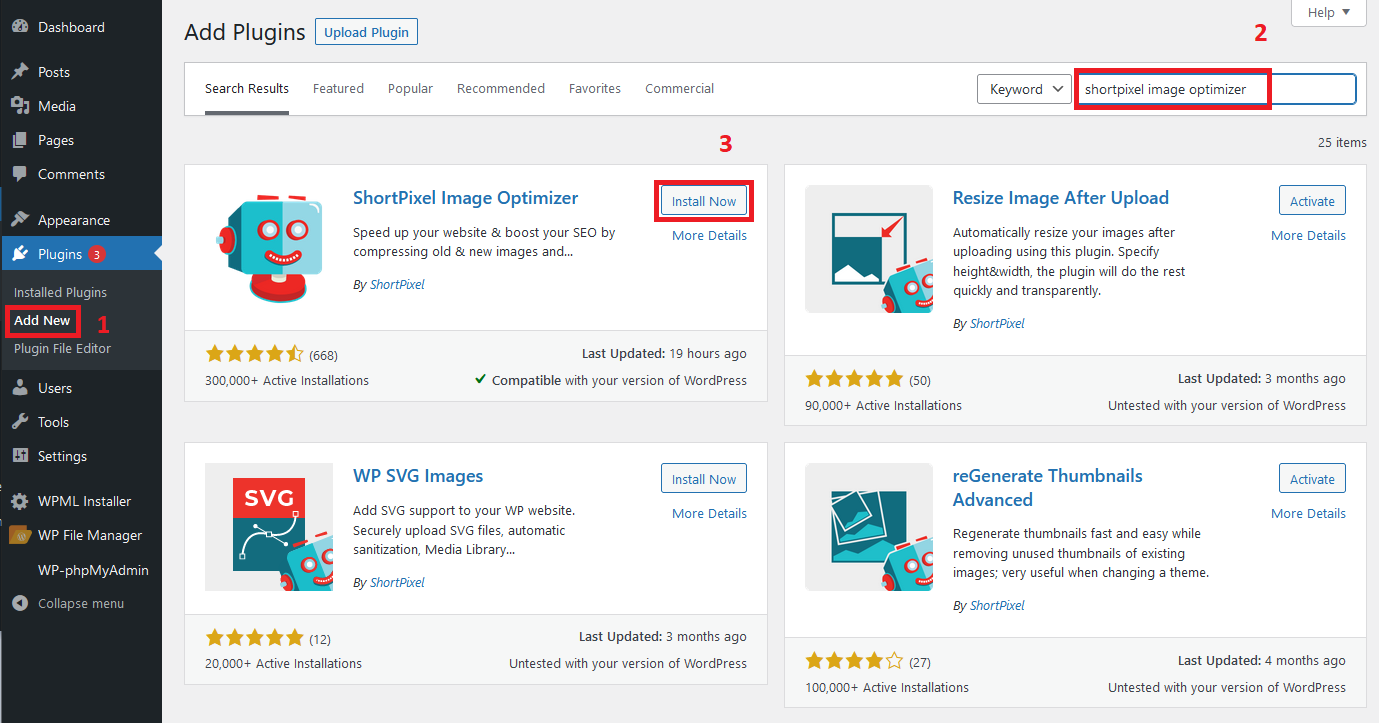
1.1 By using WordPress plugin search (easy method) #
- Go to your WordPress admin area and click on Plugins > Add New.
- Find the plugin by typing “shortpixel image optimizer” in the search field.
- Click on Install Now on the ShortPixel Image Optimizer box. Once installed, the button will change to Activate. Click on it and that’s it!
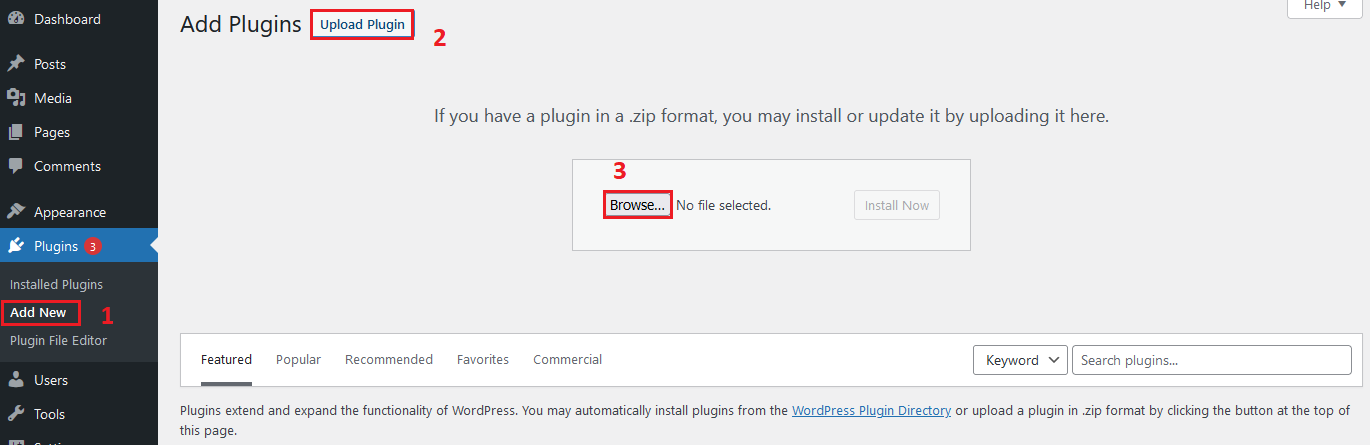
1.2 By uploading the plugin #
You can also download and upload the plugin if you don’t feel comfortable using the plugin search.
- Download the plugin by clicking here.
- Go to your WordPress admin area and go to Plugins > Add New > Upload Plugin.
- Click Browse, look for the .zip file that you downloaded, select it, and upload it by clicking on Install Now. After activating it, that’s it!
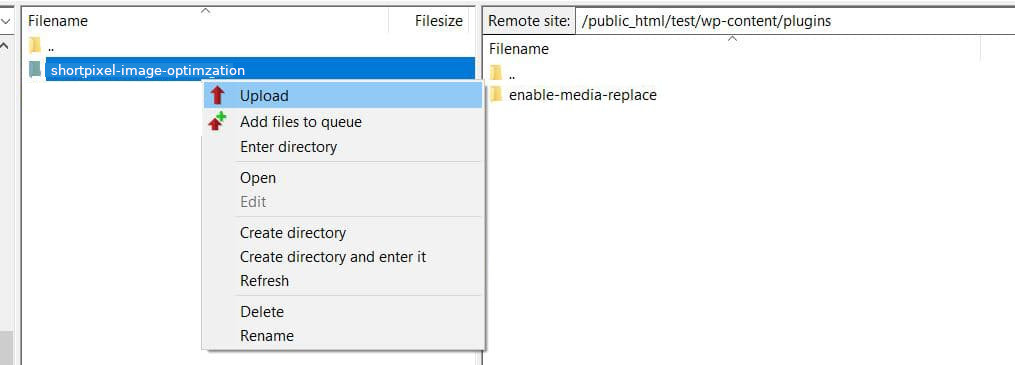
1.3 Manually using FTP #
The 3rd way, which is for experienced users, is to download and upload the plugin via FTP.
- Download the plugin by clicking here.
- Extract the .zip file on your computer. Extracting the plugin .zip file will create a new folder with the same name. This is the folder that you need to manually upload to your website using an FTP client.
- Open the FTP client and connect to your website using the login credentials provided by your web host.
- Once connected, you need to access the
/wp-content/pluginspath. - Upload the folder you extracted from the .zip file to the
/wp-content/pluginsfolder on your web server.
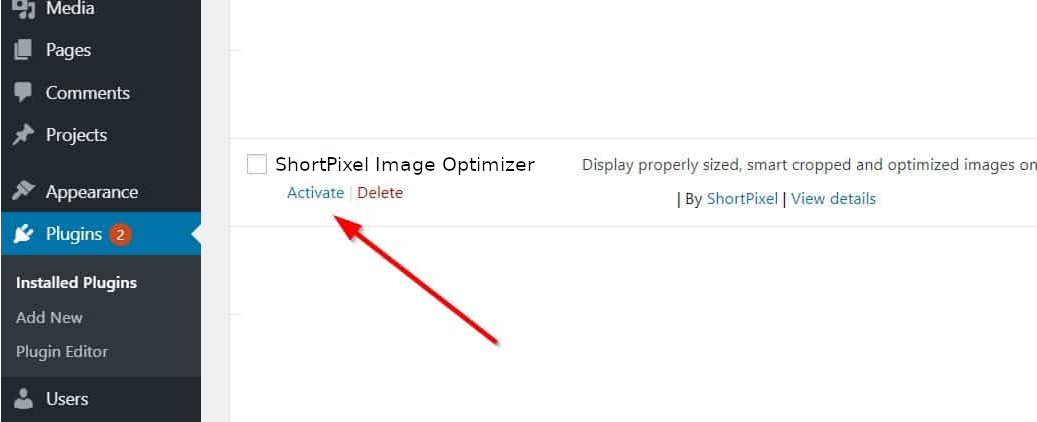
- After uploading the files, go to the WordPress admin area and click on Plugins in the admin menu. You will see your plugin successfully installed on the plugins page.
- Click on the Activate link, as seen below.
2. Adding your API Key #
In order for the optimization process to work, you must configure the plugin with the API Key associated with your account.
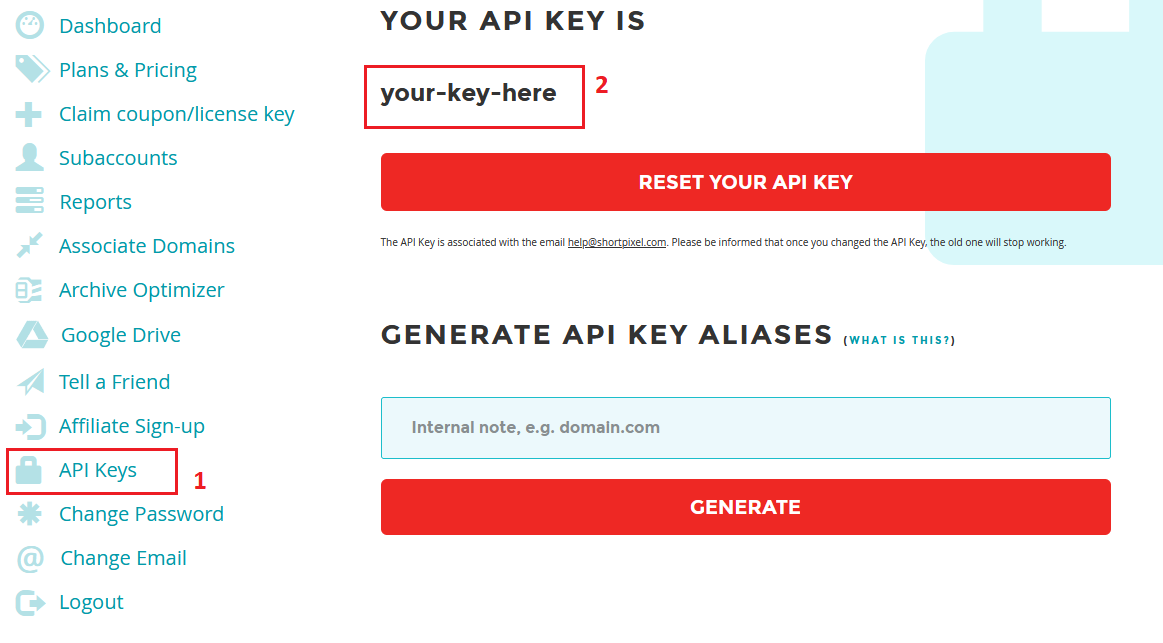
- Log in to your ShortPixel account, go to the API Key menu and copy your API Key.
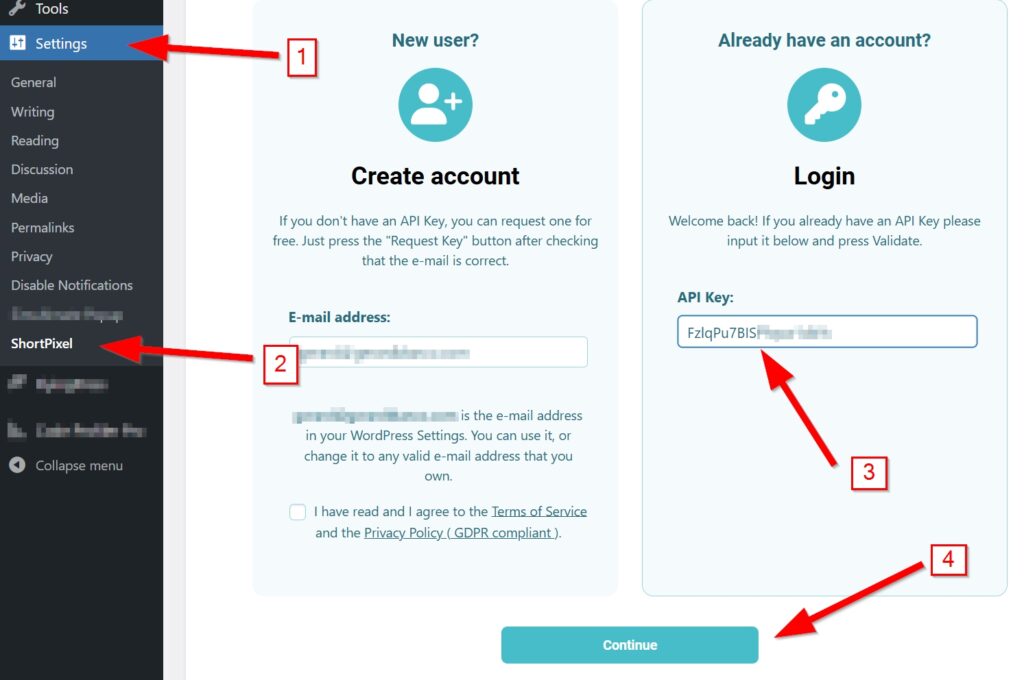
- Go to the plugin settings (Settings > ShortPixel) and paste the API Key you copied.
- Once copied, press the Validate button.
3. Optimizing your images #
All done, now you can start using the plugin.
- Go to Settings > ShortPixel and review all the settings to make sure everything is set up according to your preferences. You can go to this section of our knowledge base in case you have any doubts or concerns.
- Once everything is set, you have two options:
- Pat yourself on the back; your next uploads will be automatically optimized (as long as you did not change it before).
- Go to the menu Media > Bulk ShortPixel to optimize all the images that were uploaded before installing the plugin.
Important: Remember that after optimizing your images, you should clear the cache of your site. You can follow our guide here: How to clear WordPress cache